
I explained in a previous blog post about monitoring your Power Platform canvas application with Azure Application Insights. It is possible to quickly and easily connect the low-code application with Application Insights and get standard insights. What is next?
Often, an application has a lot of logic behind the scenes. Sometimes the impact is logical, and sometimes it is not so transparent to visualize and understand the reason correctly. The standard logging in Application Insights is already sufficient, but we want to monitor more and get more insights into what is happening with the application?
From … Who is clicking that button? Which image has been used the most? What is the duration of patching a new record in a SharePoint list?

Logging any personnel data in Europe, need to consider any data compliance obligations, such as GDPR, that you might also need to implement.
All kinds of questions or KPIs we would like to measure. So my question is, then,
How can we get more out of the monitoring than the standard logging?
Aha …
Creating “custom logging” with the trace – function.
Adding custom logging with the Trace function can help us with this.
How about creating “custom logging” in a canvas app?
Using the Trace function to record diagnostic information from behind the scenes, creating a timeline of what is happening to better understand how the app is operating and helping debug issues. When using it in a canvas app, the trace output appears in the Power Apps monitor tool within other Canvas app activities.


The trace function can also send information to your Application Insights resource. If the canvas app has an instrumentation key configured. The trace function can only be used in behaviour formulas.
So let’s look at some code examples with trace function:
Examples of “custom logging” with the trace – function in a canvas app.
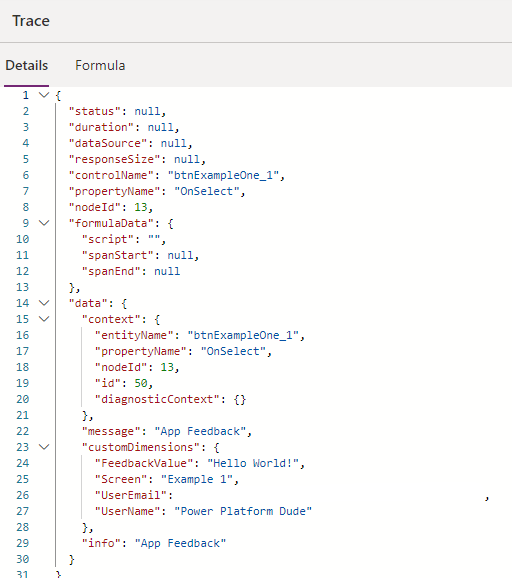
Example 01: send information about the user
Trace(
   "App Feedback",
   TraceSeverity.Information,
       {
         UserName: User().FullName,
         UserEmail: User().Email,
         Screen: "Example 1",
         FeedbackValue: "Hello World!"
       }
     );
The code will trace an informational message with the logged-in user’s full name, email address, and an example feedback value. Including the screen where the trace has been taken. This is visible in the Power Apps Monitoring tool as follows:

Example 02: send information about a picture and message text length in a post
Trace(
   "Used image",
   TraceSeverity.Information,
       {
         Screen: "Confirm Screen",
         FeedbackValue: gal_Images.Selected.'FileName',
         ComplimentLength: Len(txt_Message.Text)
       }
     );
This code will trace an informational message with information about a selected image from a gallery and the length of a message filled in by the end user.
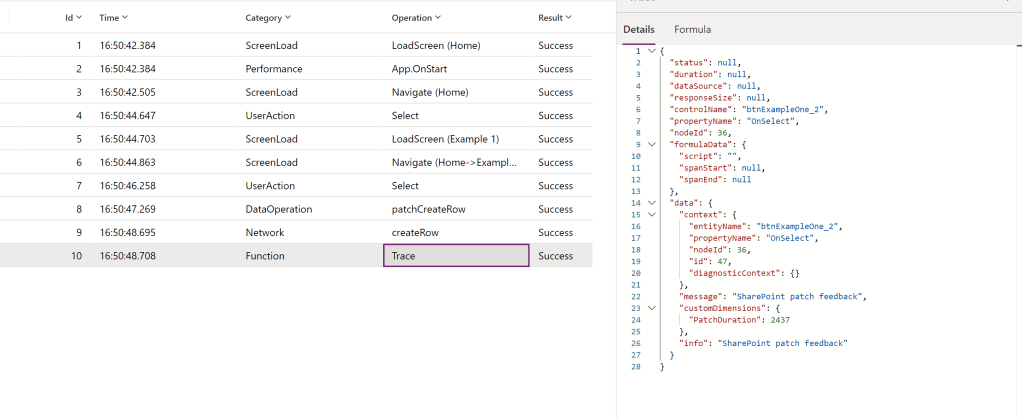
Example 03: Measure the time a patch takes towards a SharePoint list
//Set the start time
Set(varStartTime,Now());
//patch values to a list on SharePoint
Patch( 'Test List for Trace Function', Defaults( 'Test List for Trace Function' ), { Title: User().FullName, Date: Now() } );
//Set the end time
Set(varEndTime,Now());
//Calculate the time difference in milliseconds
Set(varRunTime,DateDiff(varStartTime, varEndTime, Milliseconds));
//Trace the result
Trace(
   "SharePoint patch feedback",
   TraceSeverity.Information,
       {
         PatchDuration: varRunTime
       }
     );
The code will trace an informational message with a patch’s duration value to add a record to a SharePoint list. Trace information visible in Power Apps Monitor
Where and how do we get our trace information within Azure Application Insights?
The canvas app has the instrumentation key = check. The trace information is sent, and now let us look at the following stage and how we get trace information from Azure Application Insights?

- Go to the Azure portal and navigate to the Application Insights resource.
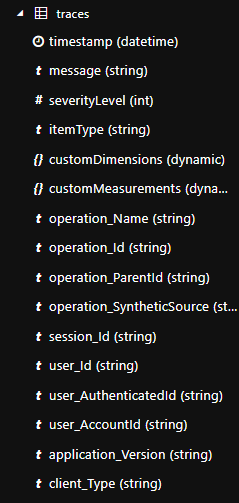
- Click on the “Logs” option on the left-hand side menu. All trace information is stored in the traces table in the Azure Log Analytics workspace.
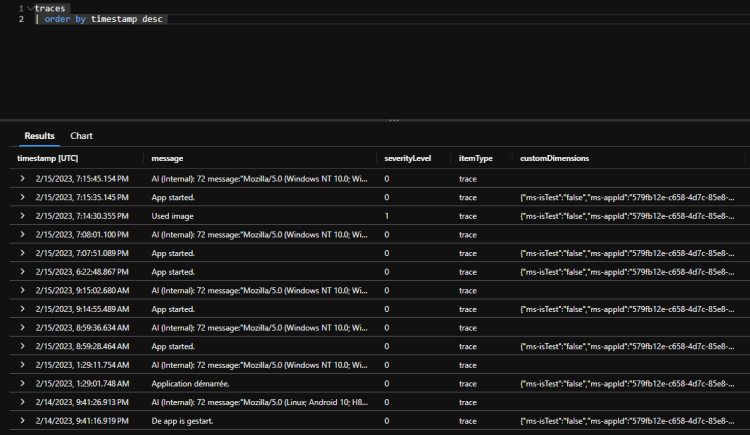
- Write a query in the “Logs” section to retrieve the trace information. Here’s an example Kusto query to get all traces:
traces
| order by timestamp desc
- Modify the query to filter the traces by different properties, such as severity level or custom properties.
- Click the “Run” button to execute the query and see the results.
- Export the trace information to various destinations, such as Azure Blob Storage or Event Hub, by clicking the “Export” button and following the instructions.
In addition to using the Azure portal, retrieving trace information programmatically using the Application Insights REST API or one of the client libraries for .NET, Java, JavaScript, Python, or other languages.
Let us continue with example 03 from above, where the duration of a patch request is sent towards the traces table in application insights. How do we get the duration value out of it? We go step by step, and let us first see what is in the traces table. Add the Kusto code and specify a time range (time range can also be added as code, see example)
traces
| where timestamp > now() - 2d
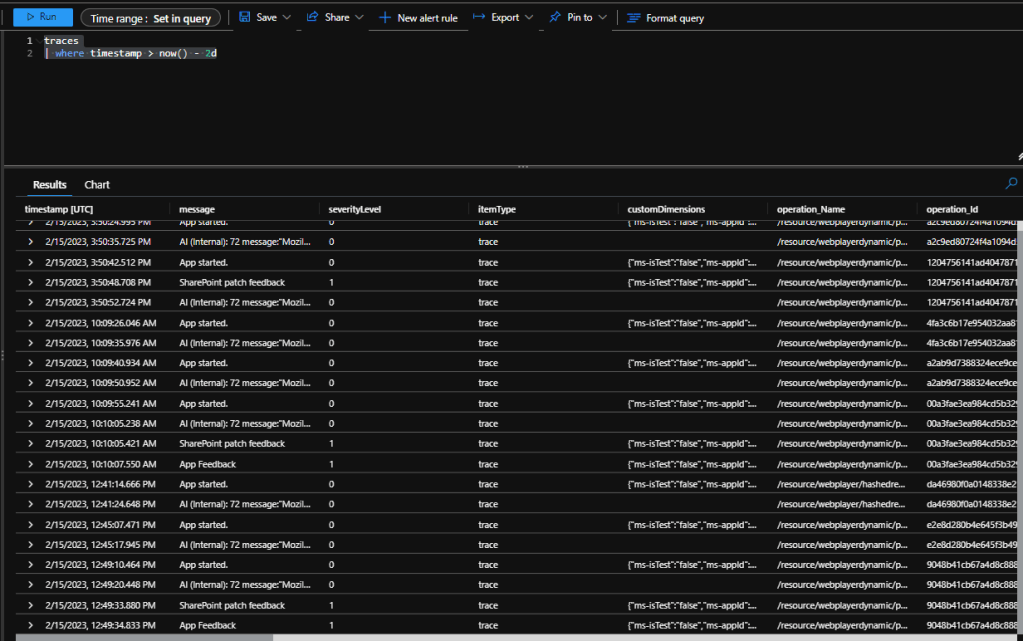
Look at the message text, open the one where we have “SharePoint patch feedback”, and see what is inside this message.

The message contains information about client type, model, OS, IP, city and user-session information. Let us dive deeper into the custom dimensions property.
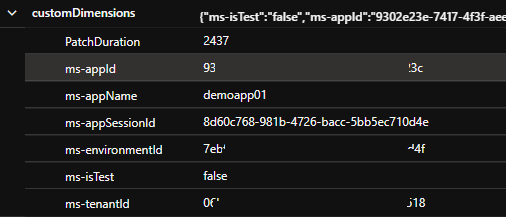
The custom dimensions property list the information about the trace function information that we have sent from the canvas app. This example will show the amount of the patch duration in milliseconds and some app information like id, name, session id and environment id. In this case, I’m interested in the value of the “PatchDuration” and how to get it from the custom Dimensions property and get it into a line chart graph.
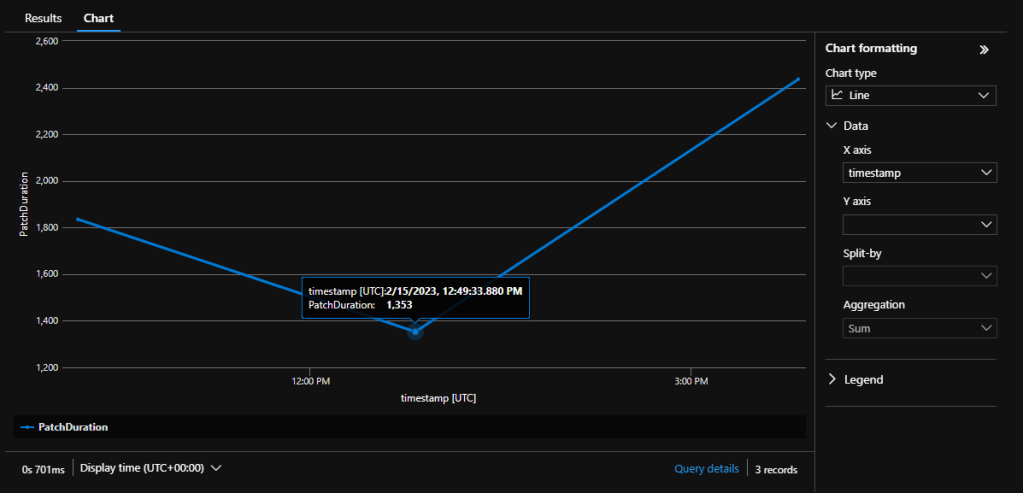
traces
| where message == "SharePoint patch feedback"
| extend PatchDuration = toint(customDimensions.PatchDuration)
| project PatchDuration, timestamp
The code above will search for messages with a value equal to “SharePoint patch feedback”. Extending the functionality of the Kusto query to convert the “PatchDuration” value to an integer value. Project the result with the following columns PatchDuration and timestamp. It will allow us to use the values in a line chart to visually represent the output results.
Conclusion.
How cool is this? Getting your own measurements into Azure Log Analytics to get more
- Insights on your canvas app
- near real-time KPIs
- Export to Power BI reporting possible to a new dataset and an M query.
If you like this blog. Please give me a dumbs up, share the blog or leave comments below.
In the next blog, we will examine how to involve Azure Monitor alerts!

1 comment