

How Gartner defines Artificial Intelligence (AI)?
Gartner defines Artificial Intelligence (AI) as “a technology that appears to emulate human performance typically by learning from data, and at times mimicking human-like tasks such as perception, cognitive reasoning, decision-making and natural language processing.”
Artificial Intelligence (AI) has been a buzzword in the tech industry for years, and it’s only in recent periods that it’s become more accessible to businesses and individuals. OpenAI’s ChatGPT AI model, released on June 11, 2022, became a trend beginning this year, 2023.
Microsoft has been investing heavily in AI research and development, and its efforts are paying off with a range of innovative products and services. See “Microsoft and OpenAI extend partnership“
Microsoft and OpenAI extend their partnership
The third phase of our long-term partnership with OpenAI through a multiyear, multibillion dollar investment to accelerate AI breakthroughs to ensure these benefits are broadly shared with the world.
Microsoft is at the forefront of the AI revolution, from chatbots to facial recognition technology, and is suitable for healthcare, finance, and manufacturing industries. With the rise of data-driven decision-making and automation, the demand for AI is growing, and Microsoft is well-positioned to be a significant player in this area. In this blog, I will take a closer look at the power of Azure Cognitive Services and how we can bring this towards the Power Platform.
Azure Cognitive Services.
Azure Cognitive Services is a part of the core PaaS cloud-based artificial intelligence (AI) services developed by Microsoft. It allows developers to easily add intelligent capabilities in these five categories as vision, speech, language, decision-making, search, and Azure openAI services to their applications without deep expertise in AI or data science (Marked as #ProCode – level of knowledge needed). It will reduce the time and cost of building an intelligent application from scratch.

A short overview of the offered services by Azure Cognitive services, see the tables below to learn about those categories (below list provided by Microsoft)
Vision APIs
| Service Name | Service Description | Quickstart |
|---|---|---|
| Computer Vision | The Custom Vision Service lets you build, deploy, and improve your image classifiers. An image classifier is an AI service that labels images based on visual characteristics. | Computer Vision quickstart |
| Custom Vision | The Custom Vision Service lets you build, deploy, and improve your image classifiers. An image classifier is an AI service that labels images based on visual characteristics. | Custom Vision quickstart |
| Face | The Face service provides access to advanced face algorithms, enabling face attribute detection and recognition. | Face quickstart |
Speech APIs
| Service Name | Service Description | Quickstart |
|---|---|---|
| Speech service | Speech service adds speech-enabled features to applications. Speech service includes various capabilities like speech-to-text, text-to-speech, speech translation, and many more. | Go to the Speech documentation to choose a sub-service quickstart. |
Language APIs
| Service Name | Service Description | Quickstart |
|---|---|---|
| Language service | Azure Language service provides several Natural Language Processing (NLP) features to understand and analyze text. | Go to the Language documentation to choose a sub-service quickstart. |
| Translator | The translator provides machine-based text translation in near real-time. | Translator quickstart |
| Language Understanding LUIS | Language Understanding (LUIS) is a cloud-based conversational AI service that applies custom machine-learning intelligence to a user’s conversational or natural language text to predict overall meaning and pull out relevant information. | LUIS quickstart |
| QnA Maker | QnA Maker allows you to build a question-and-answer service from your semi-structured content. | QnA Maker quickstart |
Decision APIs
| Service Name | Service Description | Quickstart |
|---|---|---|
| Anomaly Detector | Anomaly Detector allows you to monitor and detect abnormalities in your time series data. | Anomaly Detector quickstart |
| Content Moderator | Content Moderator provides monitoring for possible offensive, undesirable, and risky content. | Content Moderator quickstart |
| Personalizer | Personalizer lets you choose the best experience to show your users, learning from their real-time behaviour. | Personalizer quickstart |
Azure OpenAI
| Service Name | Service Description | Quickstart |
|---|---|---|
| Azure OpenAI | Powerful language models, including the GPT-3, Codex and Embeddings model series for content generation, summarization, semantic search, and natural language to code translation. | Azure OpenAI quickstart |
Let us look at an example and how we can use the power of Azure cognitive service from a Power Platform – Canvas App. The example will let you scan books to detect front, cover, colophon, and back flip. The AI model will categorise the pictures into the previously named categories and give the prediction value. The AI model used here, is the Custom Vision model.
A. Create the custom vision model in Azure
Step A.1. Create an Azure Cognitive Services resource
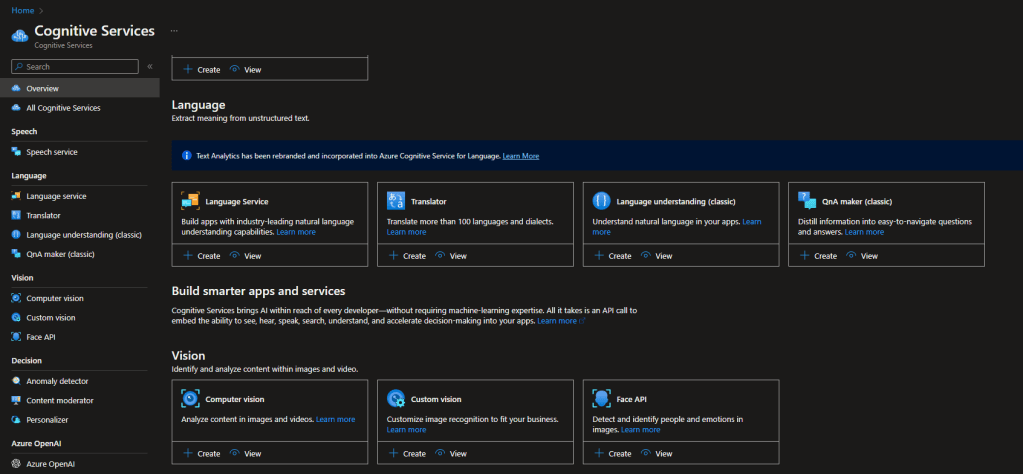
- Login to your Azure portal and go to the Cognitive Services section.
- Click on “Create” from the list of available services in the Custom Vision section.
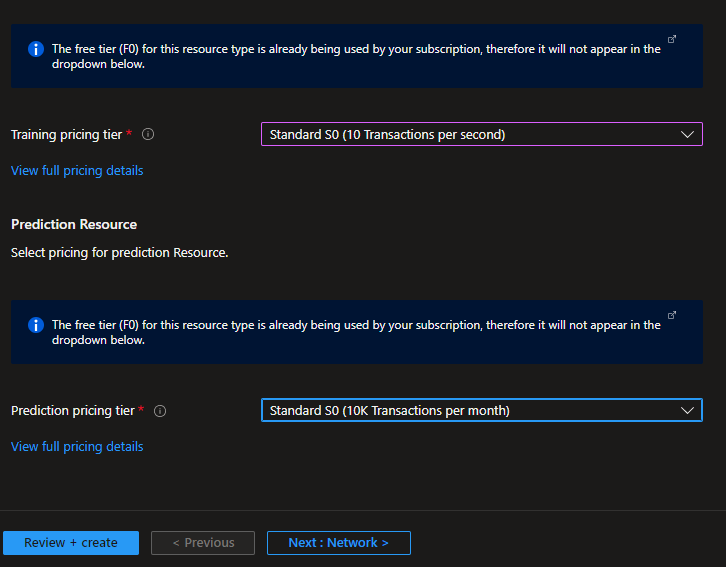
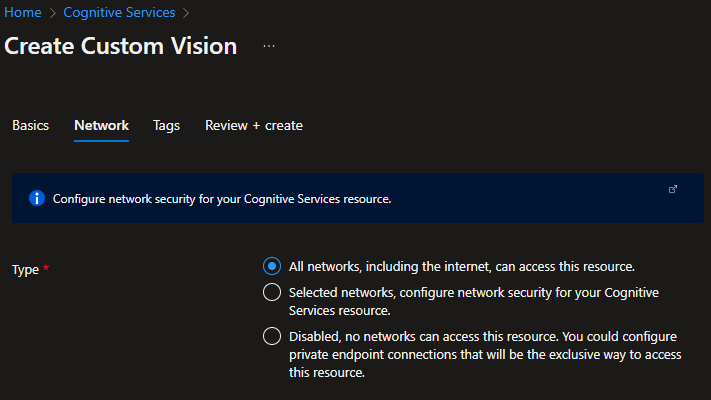
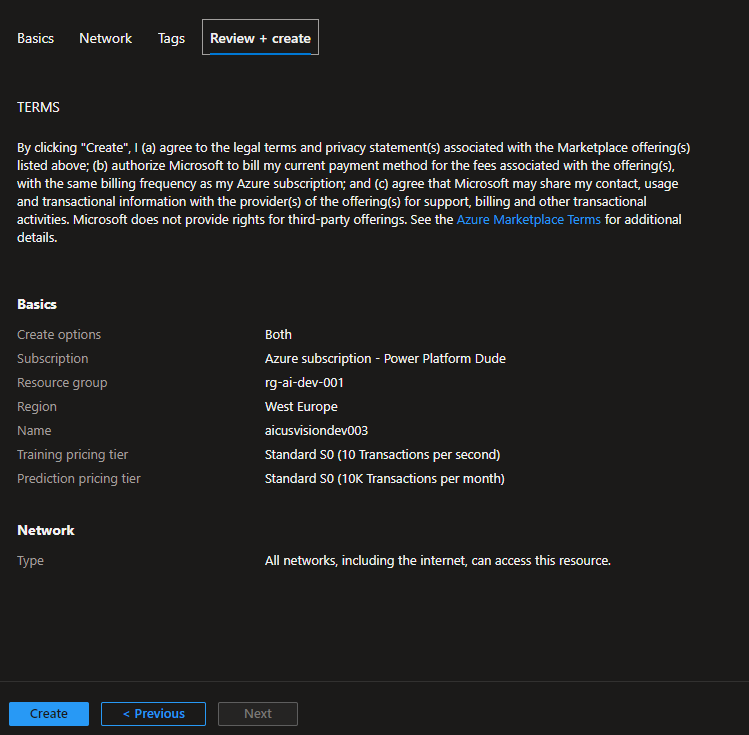
- Enter a name for your resource, select a subscription, resource group, and location, and then click “Create.”

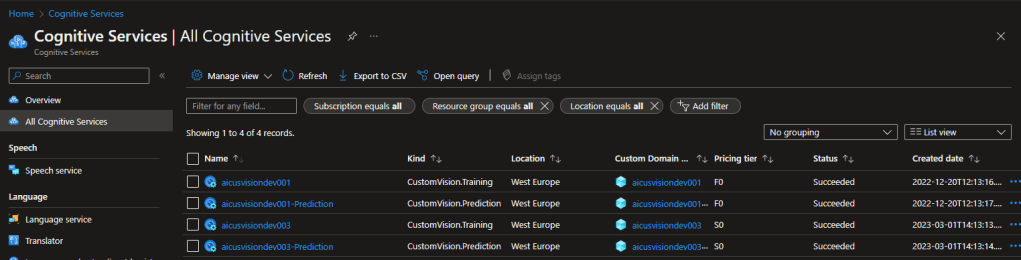
The custom vision resource has been created, navigate to the custom vision portal.
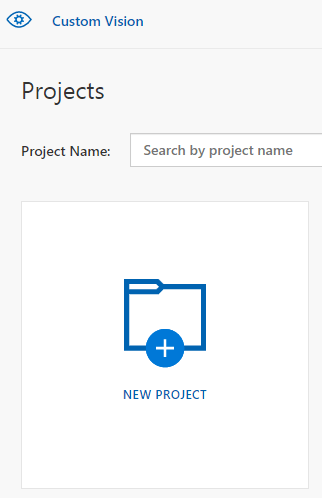
Step A.2. Create a custom vision project

- Go to the Custom Vision portal and log in with your Azure account.
- Click on “New Project” and provide a name and description for the project.
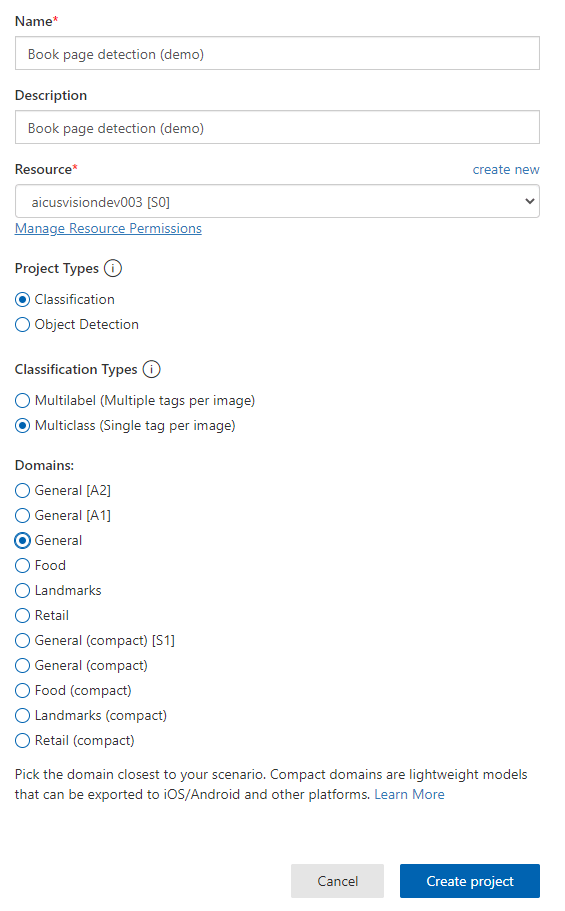
- Enter the name and description, and select the resource created in step A.1. Project Type is in the example classification of a picture from a book-specific page. This page of the book needs to be classified with one category value. The select domain is general. More information about the domain can be found here.
Once the Custom Vision resource is created, navigate to the “Keys and Endpoint” section to obtain the endpoint URL and key.
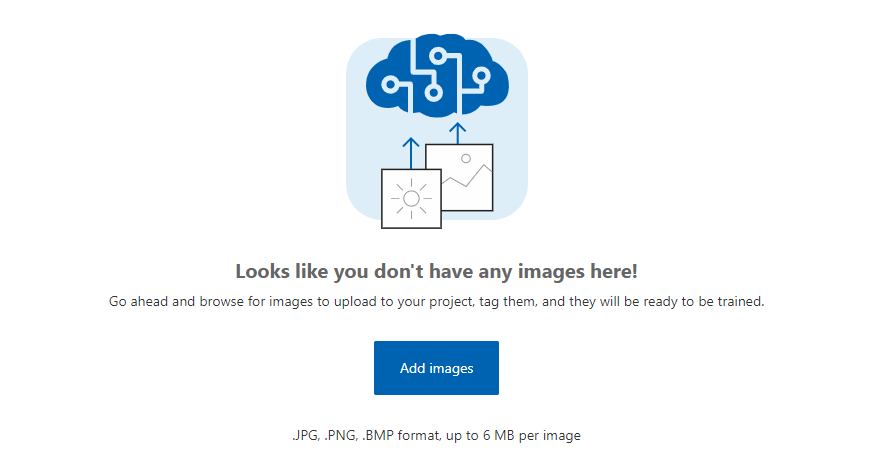
Step A.3. Add and label images
- Upload images to your project by clicking “Add Images” and selecting the files.
- Label the images by selecting them and clicking the appropriate tag(s) in the toolbar.

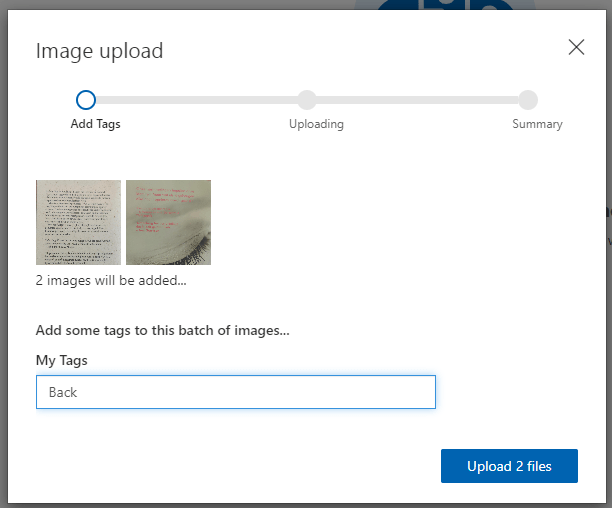
Upload is done for the books’ front, cover, colophon and back, with the matching tag value.
What is the amount of images needed to create a good AI model?
The amount of images required to train an Azure Cognitive Service Custom Vision model depends on various factors, such as the complexity of the object you are trying to recognize, the variability of the object’s appearance, and the accuracy you want to achieve in your model.
In general, having at least 50 images per tag category is recommended for a proper performance model. However, more images may be required for more complex or various objects. Microsoft recommends having at least 200-300 images per tag value for optimal performance.
It is also important to note that the quality of the images is equally important as the quantity. Images should be different from each other, of high quality, and represent the real-world scenarios in which the model will be used.
In addition to the number of images, having a balanced dataset is essential, meaning that each class should have roughly the same number of images. This helps ensure the model does not become nonobjective towards one tag category over another.
Overall, the number of images needed to train an Azure Cognitive Service Custom Vision model can vary based on the factors mentioned above. It is recommended to start with a small number of images and gradually increase the dataset size as needed to achieve the desired level of accuracy.
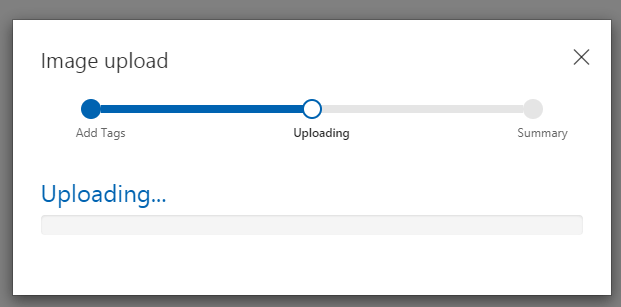
Step A.4. Train and test the model

- Click on the “Train” button to train the model using the labeled images.
- Once the training is complete, test the model by uploading new images and checking the predictions.
Step A.5. Use the model in a canvas app
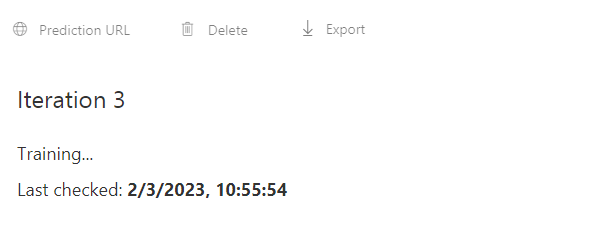
- Once the model has been trained, we can activate the predication interation. Click Publish.
- Name the model with an proper name
- Select the prediction resource on Azure and click publish.
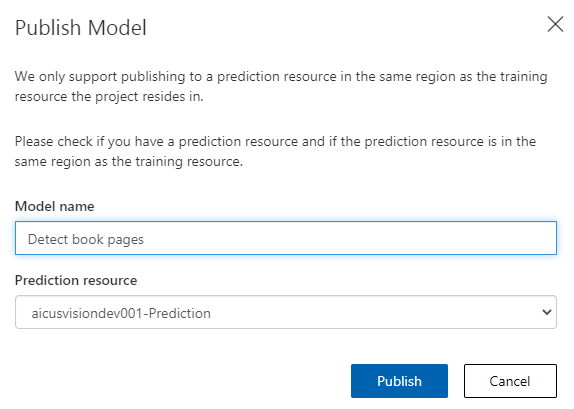
Onces published this model can be used, let us see how we can implement this in a canvas app.
B. Use the model of the custom vision in a Canvas app.
Step A.1. Create a new Custom Vision connection in the Power Platform
Go to the environment where you want to add the connection and click in the left pane on ‘Connections’.
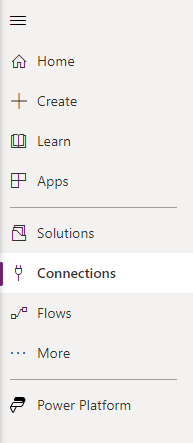
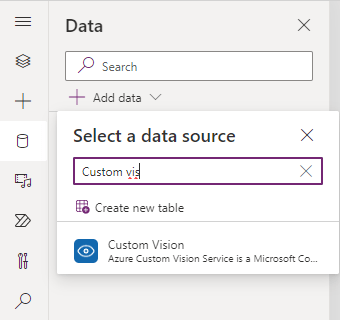
Click ‘New connection’ and search for ‘Custom Vision’
Custom Vision is a standard connector, no additional Power Platform licenses is needed to use this in Power Automate and Power Apps.
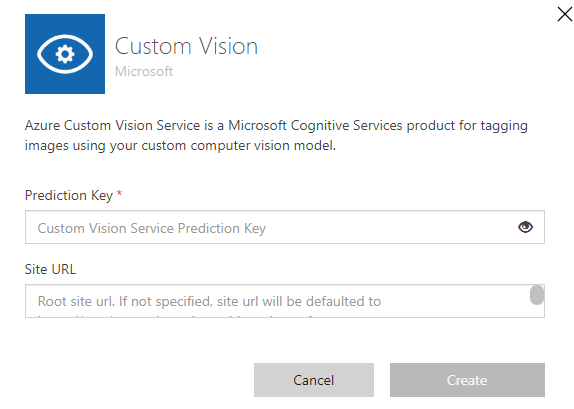
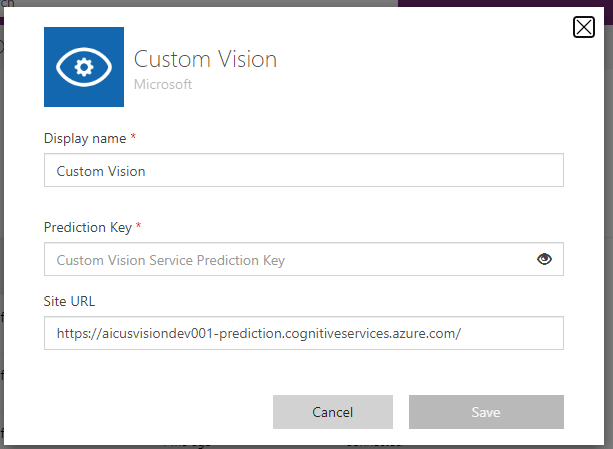
We need to the prediction key and the site URL from the predication azure resource.

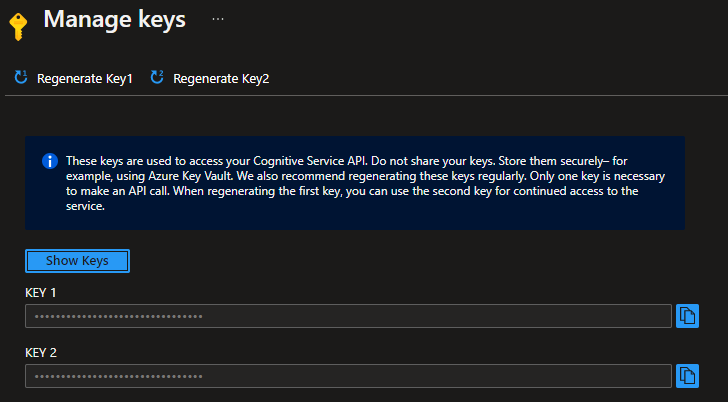
Copy the endpoint and use it as site URL. Click API keys in the get started overview and copy the first API key.
Use this key in the ‘Prediction Key’ field and click ‘create’ to create the connection.
Step B.2. Add the Custom Vision to a Canvas App.
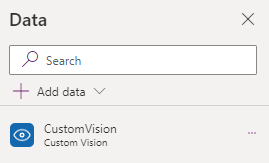
In the Canvas app, we add first the Custom Vision data source connection.
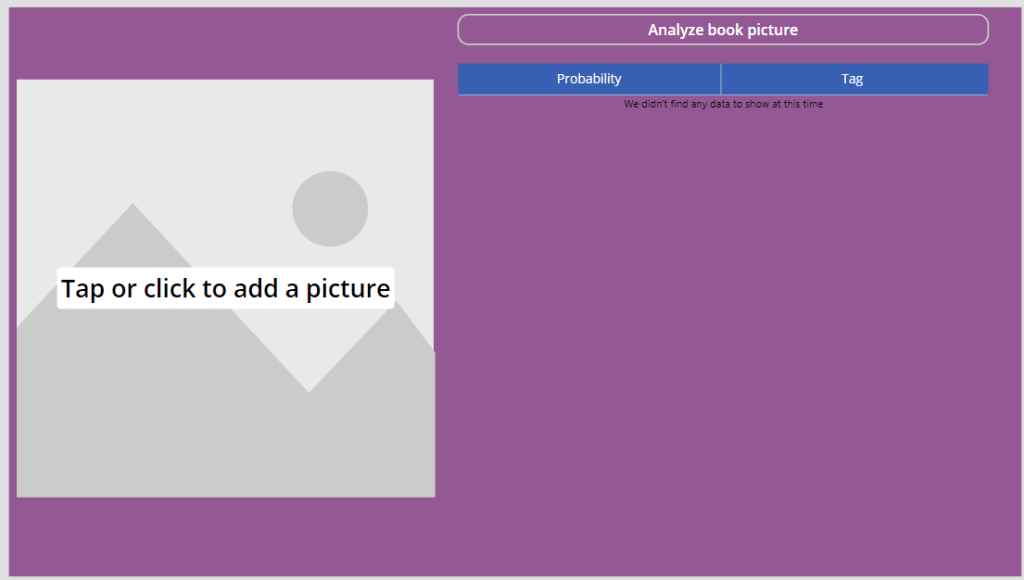
Create a screen where a picture can be added from a book and a button that will connect to the custom vision model and analyse the book picture. The result will be shown in the table below the button.
The code that is added at the Onselect property of the button is as follow:
ClearCollect(
    colImagePredictions,
    CustomVision.ClassifyImageV2(
        "[projectId]",
        "[publishName]",
        [File]
    ).predictions
)
ClearCollect(
    colImagePredictions,
    CustomVision.ClassifyImageV2(
        "ec508059-.....-5098736b2372",
        "Detect book pages",
        UploadedImg.Image
    ).predictions
)
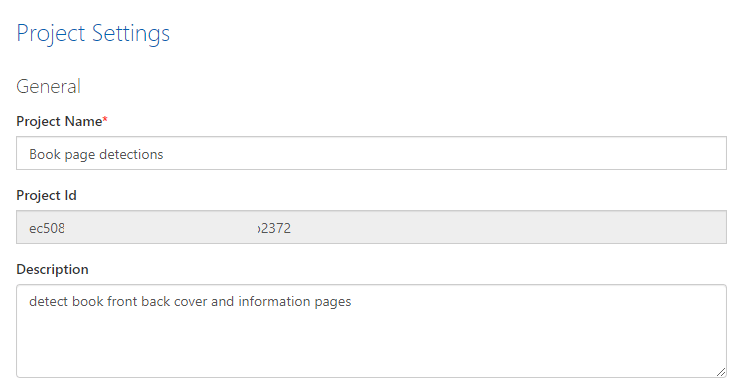
The Project Id can be found in the project settings page of the custom vision model qnd the ‘publishName’ is the published name of the published iteration of the model. File will be the uploaded image of the image control.
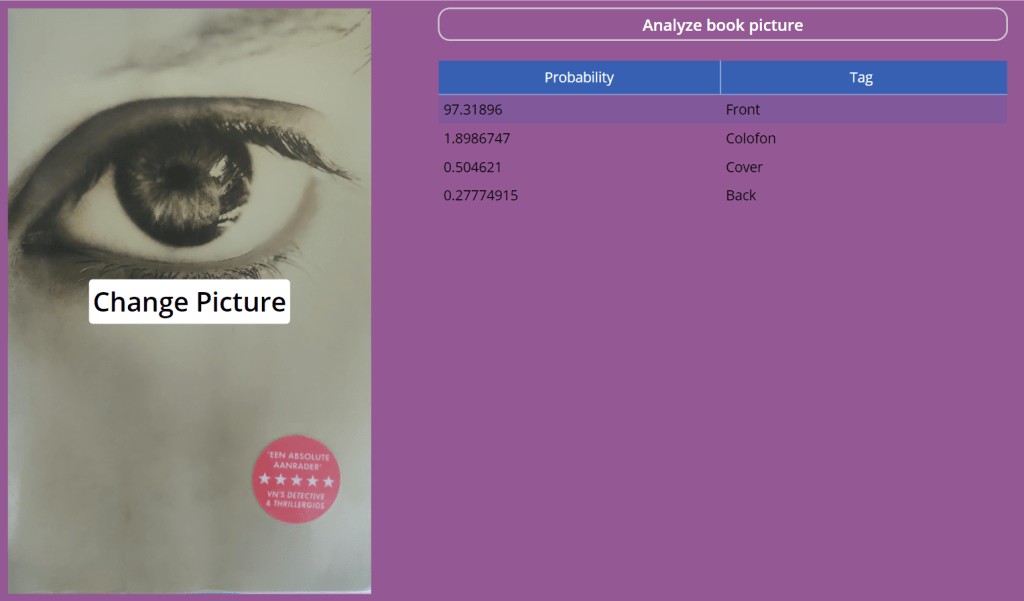
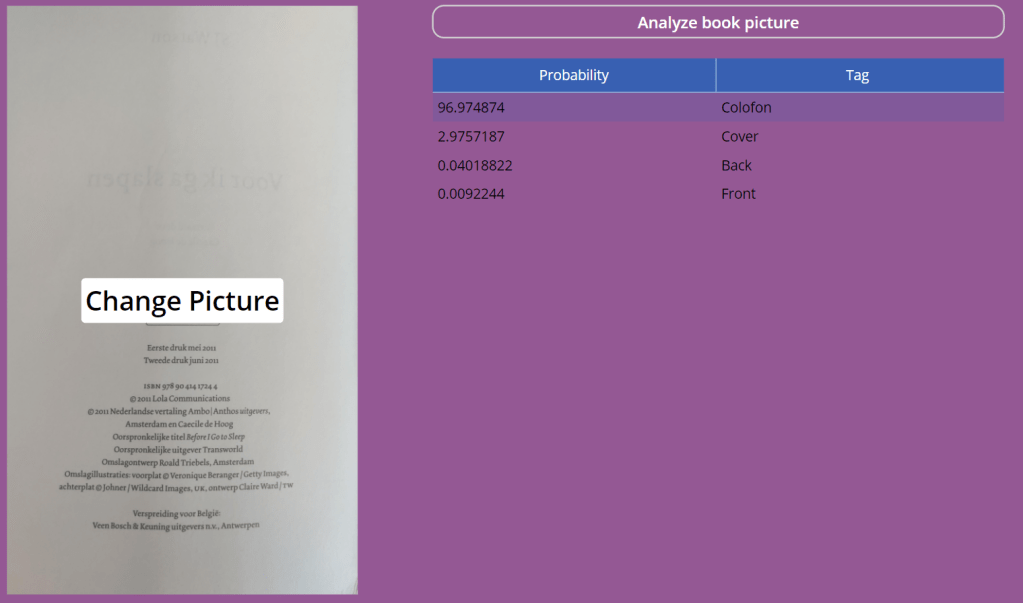
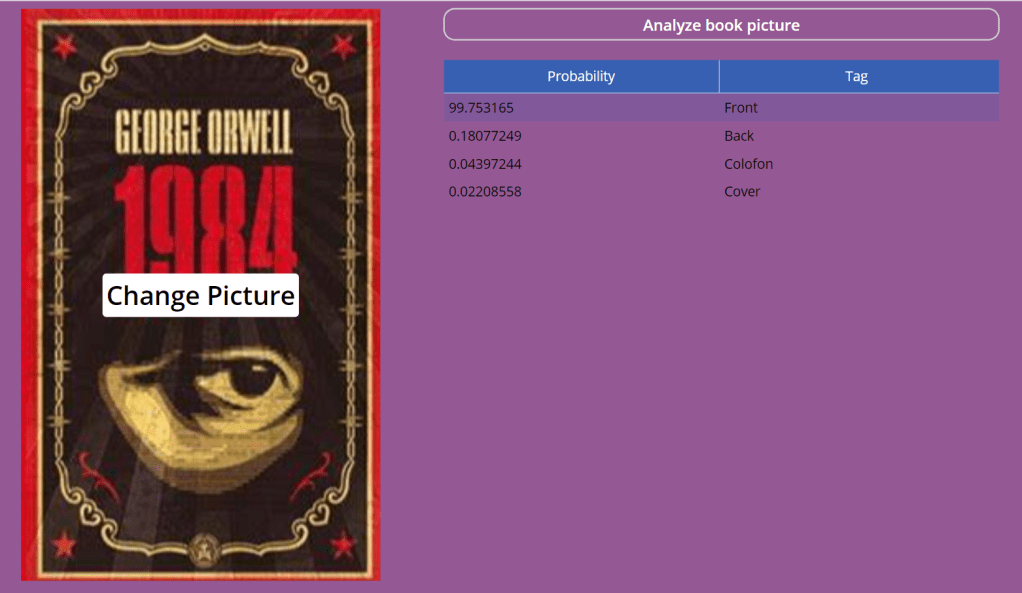
The result is and of the prediction is from the data type table. This will be temporary stored in a collection and shown in the canvas app in this example. Some examples that have been analysed by the AI custom vision model.


Conclusion
The combination of #ProCode and #LowCode is a powerful approach to application development, and using Azure as a platform further enhances its capabilities. With the flexibility of the Azure platform, both Azure Administrators and Pro-Developers can prepare the AI models. At the same time, Citizen Developers can use these AI models to develop applications. Additionally, Fusion development enables scaling out application development to meet business needs. Overall, building and integrating with an AI model into a Canvas App is a straightforward process that can be easily accomplished with some knowledge of Azure and the Custom Vision connector documentation. With the Power of Azure at our fingertips, the Power Platform becomes an even more compelling solution for organizations seeking to develop applications with AI possibilities.
If you like this blog. Please give me a dumbs up, share the blog or leave comments below.
Photo by Andrea De Santis on Unsplash

1 comment